WebIDQ on-premises installation guide
Before starting with the installation, check the system requirements carefully together with the local IT team.
The PostgreSQL is required for using WebIDQ on-premises but is not provided by biocrates.
ⓘ WebIDQ cloud is the product solution, including a database with the biocrates guarantee for data security.
Database installation
During WebIDQ on-premises installation, deactivate any power saving settings of the computer.
PostgreSQL
Download PostgreSQL for Windows, click here.
- On the PostgreSQL website, click on Windows.
- On the page "Windows installers" click Download the installer.
- Download the latest version for Windows x86-64.
Run the downloaded PostgreSQL installation file, e.g. postgresql-#.#-#-windows-x64.exe, and follow the instructions of the installation setup wizard.
Administrator rights are required!
Select the all components to install.
Specify a password for the PostgreSQL database.
Document this password! It is required for accessing the database and for making backups.
The name of the superuser account is postgres.
Define a port which is used to communicate with the database. The default port number is 5432.
In the Advanced Options dialog, select [Default locale].
When the Stack Builder dialog opens, click Cancel.
WebIDQ on-premises installation
For communication between the WebIDQ on-premises host and mybiocrates as well as for updates, e.g. of the user manual, ports 443 and 9090 must be open for the WebIDQ on-premises host. If required check the firewall settings.
In mybiocrates > Subscriptions check if a WebIDQ subscription is active.

If no WebIDQ on-premises subscription is active, redeem a voucher or purchase a subscription from the biocrates web shop.
Download the WebIDQ on-premises installer from mybiocrates > Downloads.
Run the downloaded WebIDQ on-premises installation file, e.g. WebIDQ-installer-###.exe, and follow the instructions of the installation setup wizard.
Administrator rights are required!
WebIDQ on-premises and mybiocrates account synchronization.
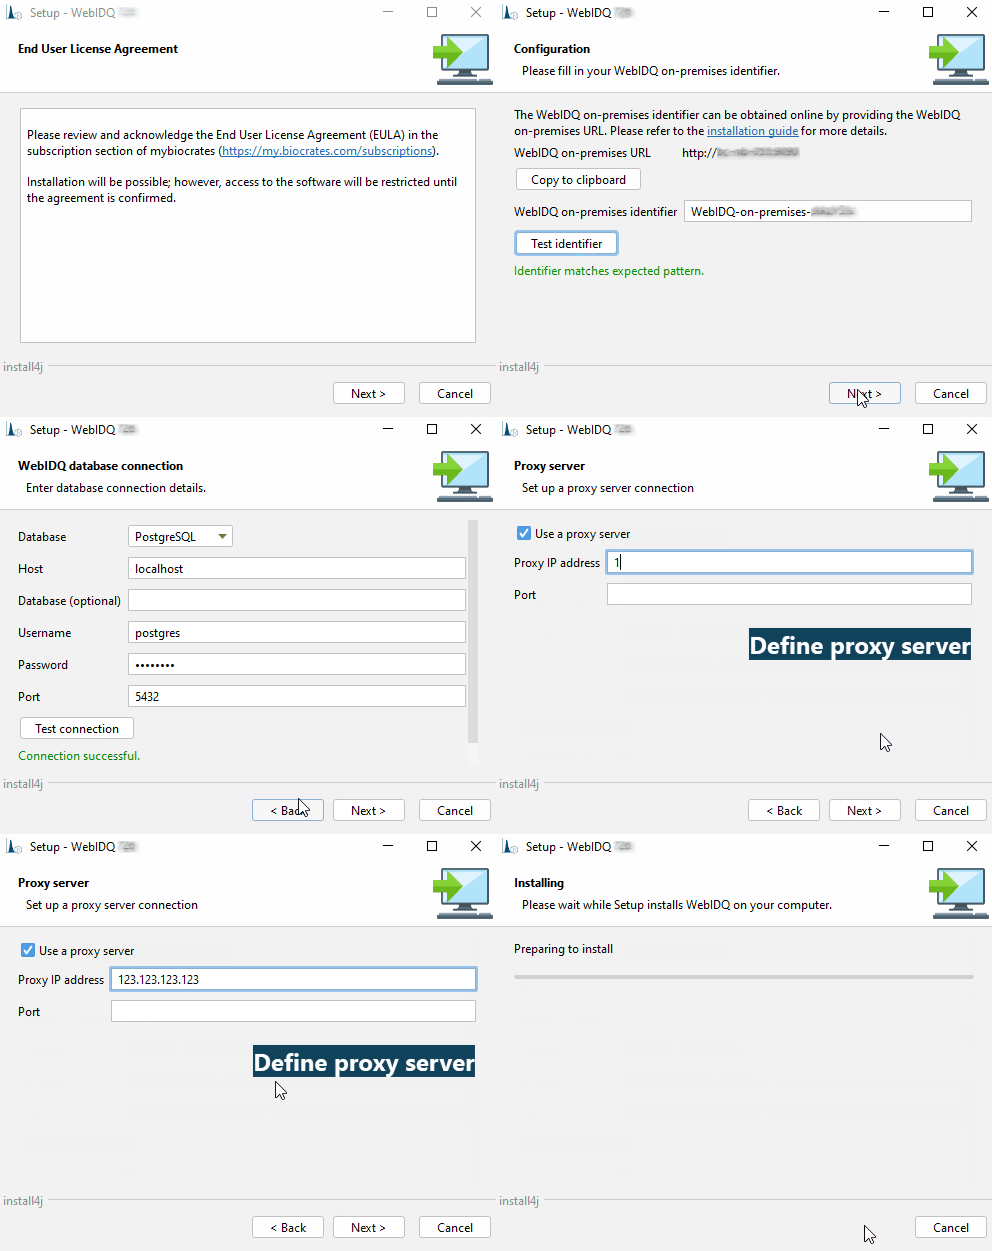
From the WebIDQ setup window Configuration, copy the "WebIDQ on-premises URL" to the clipboard.
In mybiocrates > Subscriptions, paste the "WebIDQ on-premises URL" from the "WebIDQ setup window | Configuration" (previous step) into the field "WebIDQ on-premises URL".

Click Save.
In mybiocrates > Subscriptions, to copy the "WebIDQ on-premises identifier" click
.
In the WebIDQ setup window Configuration, paste the "WebIDQ on-premises identifier" and click Test identifier.
If this information is shown
, please contact the support team.
Complete the Configuration setup, by clicking Next.
Specify database connection details for WebIDQ.
Data which is available in WebIDQ is stored in or loaded from this database.
For PostgreSQL database installation, refer to section Database installation.PostgreSQL connection settings Host PC installation: localhost Server installation: server nameDatabase default installation: no entryUsername default installationpostgres Password defined during Database setup Port default value5432 Click Test connection. If "Connection successful" is shown, click Next.
Optional | Define a proxy server
Only if a proxy server is in use in the network where the WebIDQ on-premises client is installed, define a proxy server during the WebIDQ installation!
ⓘ For details refer to section Define proxy server.
WebIDQ on-premises is installed. Database is setup on first login.
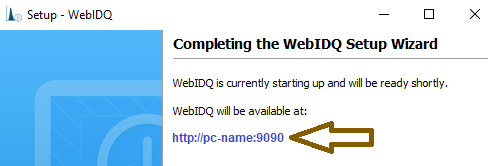
After the completion of the WebIDQ on-premises installation, the link to access WebIDQ is shown in the Setup - WebIDQ, e.g. "http://pc-name:9090".

After the installation, wait for some minutes until the link to WebIDQ will be active.
Supported web browser: Chrome or EdgeTo be able to access WebIDQ, in mybiocrates > Assign users check if WebIDQ is enabled for all assigned users.
To start WebIDQ open a web browser and use the link to WebIDQ, e.g. "http://pc-name:9090".
Define proxy server
A proxy server can be defined during the WebIDQ on-premises installation setup. To define a proxy server, follow these steps.
If WebIDQ on-premises is already installed, to define a proxy server repeat the installation.
- Download the latest version of WebIDQ on-premises from mybiocrates > Downloads.
- Run the downloaded WebIDQ on-premises installation file, WebIDQ-installer-###.exe. Administrative privileges will be required.
- During the WebIDQ on-premises installation a proxy server can be defined, as shown below in step “Define proxy server”.

The "proxy IP address 123.123.123.123" and "port 1234" serve as examples only.
OP import
Before starting with the first kit run, download all OPs for the used kit(s) and LC-MS systems(s).
Please refer to sections Kit specific OPs and Loading operating procedures.
Update WebIDQ on-premises installation
To update WebIDQ on-premises, download the latest installer from mybiocrates > Downloads.
The current version of the on-premises installation can be found in the licenses section:
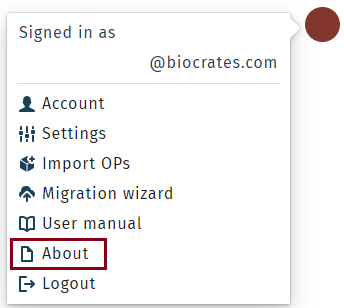
avatar icon > About > Third-party licenses

Example WebIDQ version 314:

Once the download file provides a higher number an update can be installed.
The current version of the on-premises version installer is part of the file name (WebIDQ-installer-XXX.exe)
The installation of the update may need additional rights on the server (please consult your local administrator). The installation of the update preserved all settings and data.
A mybiocrates account is required.